I discovered a minor problem when configuring manually an SAP system with usage type PI. On the second step of the configuration, Configuring Workflow for BPM, you must execute tcode SWF_XI_CUSTOMIZING. When trying to perform execute for the activity "Schedule Background Job for Deadline Monitoring", the system displays the error message "Error within method CL_SWF_ADM_JOB_FACTORY=>GET_INSTANCE->" . Then, the system does not schedule the relevant job and the status icon displays a red cross. This happens because that activity is obsolete and was not removed from automatic customizing by mistake; so you must :
1. execute transaction SM30
2. maintain the view SWFCTASK.
3. Delete all the rows for "CL_SWF_CST_DEADL_SERVICE_JOB" (usually there are two)
4. Don't forget to save;
Now, in SWF_XI_CUSTOMIZING you should be able to get green crosses everywhere, and move on to the next configuration step...
PS: these instructions are mentioned in SAP Note 1117735
Showing posts with label xi configuration. Show all posts
Showing posts with label xi configuration. Show all posts
Saturday, December 20, 2008

Monday, September 15, 2008
SAP XI Configuration (continued)
Let's pick up things from where we left off. The next step is to:
1. In the Integration Server host log on and enter transaction SM59.
2. Choose Create.

3. Name of the RFC destination: INTEGRATION_DIRECTORY_HMI
4. Connection type: H
5. In the Technical Settings tab enter the data:
■ Target Host: host name of the J2EE engine
■ Service No.: HTTP port number (the following naming convention applies: 500 like 50000, if your Java instance is 00)
■ Path Prefix: /dir/CacheRefresh

6. In the Security/Logon tab enter the data:
■ Select Basic Authentication, confirm the popup, and ignore the warning.
■ As logon data enter the client of your Integration Server and the user PIISUSER with the valid password.
Save your entry now, before you switch to next tab, otherwise your entries may be lost. Choose ENTER to go to the next screen.
7. In the Special Options tab:
■ Timeout: 30000
■ HTTP Settings: HTTP Version: HTTP 1.0, Compression: inactive, Compressed Response: No
■ HTTP Cookies: Accept Cookies: Yes (All)
8. Choose Test Connection.
The test has been executed successfully if the response status code is 500 and you find REQID not found in the HTTP body.
9. Save your settings.
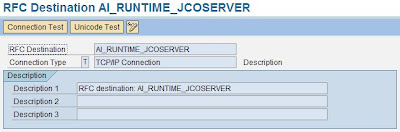
● AI_RUNTIME_JCOSERVER
Points from the Integration Server to the mapping runtime. The program ID corresponds to the entry under JCo RFC provider for the J2EE Engine (used for the mapping runtime, value mapping, and the exchange profile).
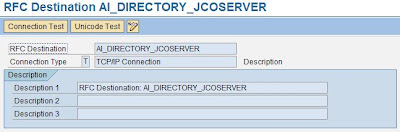
● AI_DIRECTORY_JCOSERVER
Points from the Integration Server to the Integration Builder. The program ID corresponds to the entry under JCo RFC provider for the J2EE Engine (used to refresh the runtime cache).
● LCRSAPRFC
The RFC destination LCRSAPRFC is required for the connection to the Structure linkSystem Landscape Directory (SLD). It is used to read the exchange profile.

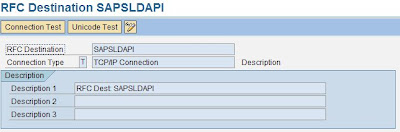
● SAPSLDAPI
The RFC destination SAPSLDAPI is required for the connection to the SLD. It is used by the ABAP API.
To maintain the RFC connections in ABAP you must:
1.Log on to your Integration Server host.
2.Call transaction SM59.
3.Choose Create.
4.Enter at least the following:
- RFC destination: AI_RUNTIME_JCOSERVER
- Connection type: T
- Description:
5.Choose ENTER.
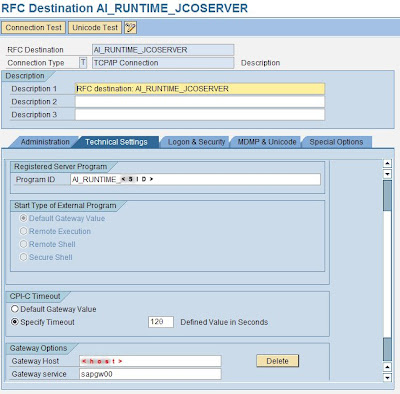
6.Choose the Technical settings tab and do the following:
a. Select Registered Server Program.
b. In the Program ID field, enter: AI_RUNTIME_[SID], where [SID] is the SAP system ID of your Integration Server host. Use uppercase letters only.
c. Enter Gateway host and Gateway service of your Integration Server host.
To find out the required parameters:
...
i. On the Integration Server host, call transaction SMGW.
ii.Choose Goto --> Parameters --> Display (see entries for gateway hostname and gateway service).
7.Choose the Special Options tab and select the Unicode flag in the Character Width in Target System box.
8.Save your settings.
9.Repeat steps 3 to 8 for the remaining destinations:
- AI_DIRECTORY_JCOSERVER
Program ID: AI_DIRECTORY_[SID], where [SID] is the SAP system ID of your Integration Server host.
- LCRSAPRFC
Program ID: LCRSAPRFC_ , where [SID] is the SAP system ID of your Integration Server host.
- SAPSLDAPI
Program ID: SAPSLDAPI_ , where [SID] is the SAP system ID of your Integration Server host.
10.Leave transaction SM59 open for later tests.
That was the ABAP part. Now let's configure the Destinations for the Java stack.
Perform the following steps:
1.On your Integration Server host, start the J2EE Engine Visual Administrator.
2.Choose Cluster --> Server --> Services --> JCo RFC Provider.
3.In the RFC destination section, enter exactly the same program ID and gateway options for AI_RUNTIME_JCOSERVER that you used above. Additionally, set the number of processes to 10.
4.In the Repository section, do the following:
a. Enter the parameters for the Integration Server host: Application Server, System Number, Client, and Language.
b. For User and Password maintain the login parameters for the user SAPJSF.
c. Select the Unicode flag.
5.Choose Set.
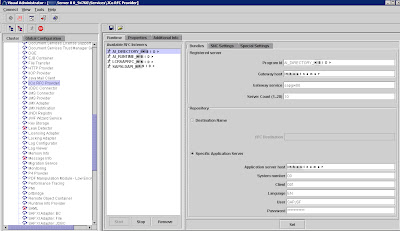
6.Repeat steps 3 to 5 for the remaining destinations:
- AI_DIRECTORY_JCOSERVER
Corresponding values from transaction SM59
Number of processes: 10
- LCRSAPRFC
Corresponding values from transaction SM59
Number of processes: 3
- SAPSLDAPI
Corresponding values from transaction SM59
Number of processes: 10
Now it's time to test the RFC Destinations:
After you have maintained all RFC destinations in both the ABAP and Java environments, you can check all the connections above as follows:
1. Call transaction SM59 again.
2. Open the RFC destination.
3. Choose Test Connection. Choose Unicode Test after that. No errors should be displayed.
We still haven't finished with the Configuration. We have 5 more steps :) But we will discuss them finally in a third and last post.
..to be continued..
- Create RFC Destinations in the ABAP environment
1. In the Integration Server host log on and enter transaction SM59.
2. Choose Create.

3. Name of the RFC destination: INTEGRATION_DIRECTORY_HMI
4. Connection type: H
5. In the Technical Settings tab enter the data:
■ Target Host: host name of the J2EE engine
■ Service No.: HTTP port number (the following naming convention applies: 5
■ Path Prefix: /dir/CacheRefresh

6. In the Security/Logon tab enter the data:
■ Select Basic Authentication, confirm the popup, and ignore the warning.
■ As logon data enter the client of your Integration Server and the user PIISUSER with the valid password.
Save your entry now, before you switch to next tab, otherwise your entries may be lost. Choose ENTER to go to the next screen.
7. In the Special Options tab:
■ Timeout: 30000
■ HTTP Settings: HTTP Version: HTTP 1.0, Compression: inactive, Compressed Response: No
■ HTTP Cookies: Accept Cookies: Yes (All)
8. Choose Test Connection.
The test has been executed successfully if the response status code is 500 and you find REQID not found in the HTTP body.
9. Save your settings.
- Creating RFC Destinations in the ABAP and Java Environments
● AI_RUNTIME_JCOSERVER
Points from the Integration Server to the mapping runtime. The program ID corresponds to the entry under JCo RFC provider for the J2EE Engine (used for the mapping runtime, value mapping, and the exchange profile).

● AI_DIRECTORY_JCOSERVER
Points from the Integration Server to the Integration Builder. The program ID corresponds to the entry under JCo RFC provider for the J2EE Engine (used to refresh the runtime cache).

● LCRSAPRFC
The RFC destination LCRSAPRFC is required for the connection to the Structure linkSystem Landscape Directory (SLD). It is used to read the exchange profile.

● SAPSLDAPI
The RFC destination SAPSLDAPI is required for the connection to the SLD. It is used by the ABAP API.

To maintain the RFC connections in ABAP you must:
1.Log on to your Integration Server host.
2.Call transaction SM59.
3.Choose Create.
4.Enter at least the following:
- RFC destination: AI_RUNTIME_JCOSERVER
- Connection type: T
- Description:
5.Choose ENTER.
6.Choose the Technical settings tab and do the following:
a. Select Registered Server Program.
b. In the Program ID field, enter: AI_RUNTIME_[SID]
c. Enter Gateway host and Gateway service of your Integration Server host.
To find out the required parameters:
...
i. On the Integration Server host, call transaction SMGW.
ii.Choose Goto --> Parameters --> Display (see entries for gateway hostname and gateway service).

7.Choose the Special Options tab and select the Unicode flag in the Character Width in Target System box.
8.Save your settings.
9.Repeat steps 3 to 8 for the remaining destinations:
- AI_DIRECTORY_JCOSERVER
Program ID: AI_DIRECTORY_[SID]
- LCRSAPRFC
Program ID: LCRSAPRFC_
- SAPSLDAPI
Program ID: SAPSLDAPI_
10.Leave transaction SM59 open for later tests.
That was the ABAP part. Now let's configure the Destinations for the Java stack.
Perform the following steps:
1.On your Integration Server host, start the J2EE Engine Visual Administrator.
2.Choose Cluster --> Server --> Services --> JCo RFC Provider.
3.In the RFC destination section, enter exactly the same program ID and gateway options for AI_RUNTIME_JCOSERVER that you used above. Additionally, set the number of processes to 10.
4.In the Repository section, do the following:
a. Enter the parameters for the Integration Server host: Application Server, System Number, Client, and Language.
b. For User and Password maintain the login parameters for the user SAPJSF.
c. Select the Unicode flag.
5.Choose Set.

6.Repeat steps 3 to 5 for the remaining destinations:
- AI_DIRECTORY_JCOSERVER
Corresponding values from transaction SM59
Number of processes: 10
- LCRSAPRFC
Corresponding values from transaction SM59
Number of processes: 3
- SAPSLDAPI
Corresponding values from transaction SM59
Number of processes: 10
Now it's time to test the RFC Destinations:
After you have maintained all RFC destinations in both the ABAP and Java environments, you can check all the connections above as follows:
1. Call transaction SM59 again.
2. Open the RFC destination.
3. Choose Test Connection. Choose Unicode Test after that. No errors should be displayed.
We still haven't finished with the Configuration. We have 5 more steps :) But we will discuss them finally in a third and last post.
..to be continued..
Friday, September 12, 2008
Post installation configuration SAP XI
I will now describe the configuration steps that are required for setting up the SAP NW with usage type PI (XI).
As i mentioned in the previous post, you can use the wizard-based configuration but i would recommend that at first you should do it manually. But alas, if you decide to use the wizard you must know to do this only on systems that haven't been configured before. If you have modified the system already or upgraded it from an older version, you should do these steps manually.
As i mentioned in the previous post, you can use the wizard-based configuration but i would recommend that at first you should do it manually. But alas, if you decide to use the wizard you must know to do this only on systems that haven't been configured before. If you have modified the system already or upgraded it from an older version, you should do these steps manually.
1. Configuration Wizard
If you want to use the wizard then open the SAP NW Administrator in a browser with the path http://host:httpport/nwa and log on as Administrator.
Then navigate to the Deploy and Change tab, select a task from the list and Start it. Enter the required data and just follow the screens, it's pretty straightforward.
2. Manual Configuration
- sap.com/com.sap.aii*
-sap.com/com.sap.lcr*
-sap.com/com.sap.xi*
And service: sap.com/com.sap.rprof.remoteProfile
So :
1. Log on with SAP_ALL rights (don't use users DDIC or SAP*).
2. Call transaction SWF_XI_CUSTOMIZING to execute the basic customization. This transaction sets all the required technical settings. The screen Automatic Workflow Customizing will appear.
3. Make sure that the Maintain Runtime Environment node has a green check (not a red cross).
If there is a red cross, do the following:
a. Select the Maintain Runtime Environment node and choose Perform Automatic Workflow Customizing.
The system will now execute the automatic customizing including all sub nodes.
4. Choose Maintain Definition Environment --> Maintain Prefix Numbers.
5. Choose Execute. The Prefix Numbers for Workflow and Organizational Management screen will appear.
6. Choose Display <-> Change to activate the edit mode.
7. In the Available Prefix Numbers for Workflow and Organizational Management box, choose Create.
8. In the dialog box, enter a Prefix number equal to or higher than 900 and choose the Save button.
9. Choose Maintain Definition Environment --> Check Entries from HR Control Tables.
10.Choose Execute. The Consistency Check of Workflow Installation screen appears. The control tables must be complete.
If you encounter any problems, i suggest you execute transaction SE38 and execute report RHTTCP77. Ignore the red cross errors regarding the transport objects PDST or PDWS.After that execute report RSWF_CATID select with the options ABAP Classes and XML Object types selected.
You should be ok now.
Perform the following steps:
1. On the SLD start page of your SLD host, choose Technical Systems. The Technical Systems page appears.
2. Select Web AS ABAP as type of your technical system.
3. In the table displayed, choose the technical system () that you have created for the Integration Server with transaction RZ70. See the Installation Guide SAP NetWeaver 7.0 at SAP Service Marketplace at service.sap.com/installNW70.
A details screen appears, where you can maintain the technical system.
4. On the Installed Products tab page, choose Add new Product.
5. In the product list, select the product SAP NetWeaver 7.0.
6. Make sure that at least the component SAP BASIS 700 is selected in the software component version list.
7. Don't forget to Save.
Perform the following steps:
1. On the SLD start page of your SLD host, choose Business Systems. The Business Systems page appears.
2. Choose New Business System…. The Business System Wizard appears.
3. Select system type Web AS ABAP and choose Next.
4. Select the technical system for your business system by selecting the system () and client of your Integration Server and choose Next.
5. Enter a name for your business system and choose Next. An installed products list appears.
6. If there are products displayed on the left that are not installed on the system, deselect them by deselecting the Installed indicator and choose Next.
7. Select Integration Server as the role of the business system and enter the following in the Pipeline URL field: http://:/sap/xi/engine?type=entry
In this Internet address, and are the ABAP host name and port number of the Integration Server. You can find by logging on to the Integration Server and running transaction SMICM (choose Goto --> Services and check the entry for HTTP).
8. Choose Finish.
9. Make sure that the host name of the Integration Server specified in the SLD matches the name specified in the exchange profile (in section Connections, property com.sap.aii.connect.integrationserver.name). If there is a mismatch, change the name specified in the exchange profile so that it matches the one specified in the SLD.
Ok, we have made the first 5 configuration steps manually. We have another 7 steps to go through. The next ones involve creating RFC destinations in the ABAP and JAVA environments and i will go through all of them but in the next post.
...to be continued...
Then navigate to the Deploy and Change tab, select a task from the list and Start it. Enter the required data and just follow the screens, it's pretty straightforward.
2. Manual Configuration
- Ok. The first thing you should do is check if some essential sap.com services are started. To do this you must log on to the Visual Administrator tool, go to Cluster --> Server --> Service --> Deploy. In the right frame, select Application.Through the list of deployed services, check if the next services are started:
- sap.com/com.sap.aii*
-sap.com/com.sap.lcr*
-sap.com/com.sap.xi*
And service: sap.com/com.sap.rprof.remoteProfile
- Performing automatic customizing
So :
1. Log on with SAP_ALL rights (don't use users DDIC or SAP*).
2. Call transaction SWF_XI_CUSTOMIZING to execute the basic customization. This transaction sets all the required technical settings. The screen Automatic Workflow Customizing will appear.
3. Make sure that the Maintain Runtime Environment node has a green check (not a red cross).
If there is a red cross, do the following:
a. Select the Maintain Runtime Environment node and choose Perform Automatic Workflow Customizing.
The system will now execute the automatic customizing including all sub nodes.
4. Choose Maintain Definition Environment --> Maintain Prefix Numbers.
5. Choose Execute. The Prefix Numbers for Workflow and Organizational Management screen will appear.
6. Choose Display <-> Change to activate the edit mode.
7. In the Available Prefix Numbers for Workflow and Organizational Management box, choose Create.
8. In the dialog box, enter a Prefix number equal to or higher than 900 and choose the Save button.
9. Choose Maintain Definition Environment --> Check Entries from HR Control Tables.
10.Choose Execute. The Consistency Check of Workflow Installation screen appears. The control tables must be complete.
If you encounter any problems, i suggest you execute transaction SE38 and execute report RHTTCP77. Ignore the red cross errors regarding the transport objects PDST or PDWS.After that execute report RSWF_CATID select with the options ABAP Classes and XML Object types selected.
You should be ok now.
- The next step is to assign application roles to user groups. You do this in the J2EE Visual Administrator. Go to Cluster --> Server --> Services --> SLD Data Supplier. Then click on the Runtime tab which is located in the right frame, then choose Assign Application Roles To User Groups and confirm the dialog.
- Now we need to maintain a product for the tehnical system and a business system for the Integration Server.
Perform the following steps:
1. On the SLD start page of your SLD host, choose Technical Systems. The Technical Systems page appears.
2. Select Web AS ABAP as type of your technical system.
3. In the table displayed, choose the technical system (
A details screen appears, where you can maintain the technical system.
4. On the Installed Products tab page, choose Add new Product.
5. In the product list, select the product SAP NetWeaver 7.0.
6. Make sure that at least the component SAP BASIS 700 is selected in the software component version list.
7. Don't forget to Save.
- Maintaining a Business System for the Integration Server
Perform the following steps:
1. On the SLD start page of your SLD host, choose Business Systems. The Business Systems page appears.
2. Choose New Business System…. The Business System Wizard appears.
3. Select system type Web AS ABAP and choose Next.
4. Select the technical system for your business system by selecting the system (
5. Enter a name for your business system and choose Next. An installed products list appears.
6. If there are products displayed on the left that are not installed on the system, deselect them by deselecting the Installed indicator and choose Next.
7. Select Integration Server as the role of the business system and enter the following in the Pipeline URL field: http://
In this Internet address,
8. Choose Finish.
9. Make sure that the host name of the Integration Server specified in the SLD matches the name specified in the exchange profile (in section Connections, property com.sap.aii.connect.integrationserver.name). If there is a mismatch, change the name specified in the exchange profile so that it matches the one specified in the SLD.
Remember that if you change the host name of the Integration Server after the installation in either the SLD or the exchange profile, you must adjust it accordingly in the exchange profile or the SLD, respectively.
Ok, we have made the first 5 configuration steps manually. We have another 7 steps to go through. The next ones involve creating RFC destinations in the ABAP and JAVA environments and i will go through all of them but in the next post.
...to be continued...
Subscribe to:
Posts (Atom)


